MotoActv: Motorola Bike Speed + Cadence Sensor
There's one bike accessories I did not mention in my previous bike post was the speedometer. Nowadays the meter is no longer a simple speed measurement device but includes other measurements like cadence and whatnot. I learned a new word, cyclocomputer after browsing through some related catalogs. I did not buy any cyclocomputer as MotoActv is more than capable of providing the similar features (and metrics).
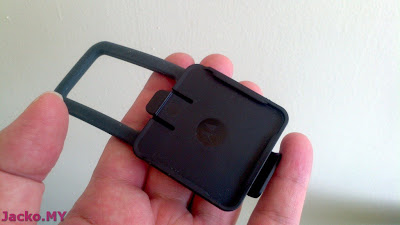
I need 2 additional accessories in order to transform the MotoActv into a complete cyclocomputer. The first is the bike mount...
The mount comes with 2 pieces of rubber cushions (one thin and one thick) to further tighten the mount onto the handlebar...
Likewise, as I mentioned in the previous post, the MotoActv is square in design and therefore it can be mounted in any direction onto any of its mount. As a result, the bike mount can be mounted on the stem (vertical)...
It can also be mounted on the handlebar (horizontal)...
One thing to consider though, most MTB comes with oversized stem these days. So the fixed length rubber strap might not be long enough to tight onto the stem. Motorola should come out with a better bike mount.
The second accessories is the sensor...
It's speed + cadence combo sensor that comes in 3-piece, as pointed by arrows in the arrow above. Everything is to be mounted on the left side of the bike. The main unit is to be mounted on the left chainstay, the cadence sensor is to be mounted onto the left crankarm and the speed sensor has to be mounted on the rear wheel (spokes) with the silver coin facing the left chainstay.
Some adjustment is required once every piece is mounted. Both magnetic sensors must stay in close range of 3-5mm with the main unit. There is an LED on the main unit that indicates the connectivity status, it blinks green whenever the sensor is detected or passes through it. The technician at LBS should know how to install if you are not comfortable with DIY.
Some advised not to use such sensor if often go off road. It makes sense that the sensor might not be built for such environment i.e. muddy, wet etc. I do not know the "ruggedness" of this sensor, Motorola did not provide any info at all.
Finally, go to MotoActv watch to pair it, similar steps like pairing the HRM. One thing to note is you must turn the crank and wheel to activate the main unit so that it can be detected by MotoActv. A cycling workout needs to be started to ensure the sensor is operational. This is what I dislike about MotoActv, I can't use any sensor without starting a workout (except HRM that one of the timepieces activates HRM when selected), and I can't browse the map when not in an outdoor workout.
Good to go now for a ride. The sensor just works like HRM feeding cadence and speed metrics to the watch, I will see if it is worth a separate post.
p/s: You can check out my other MotoActv related posts here.
p/s: You can check out my other MotoActv related posts here.


Comments
Post a Comment